
Propagation
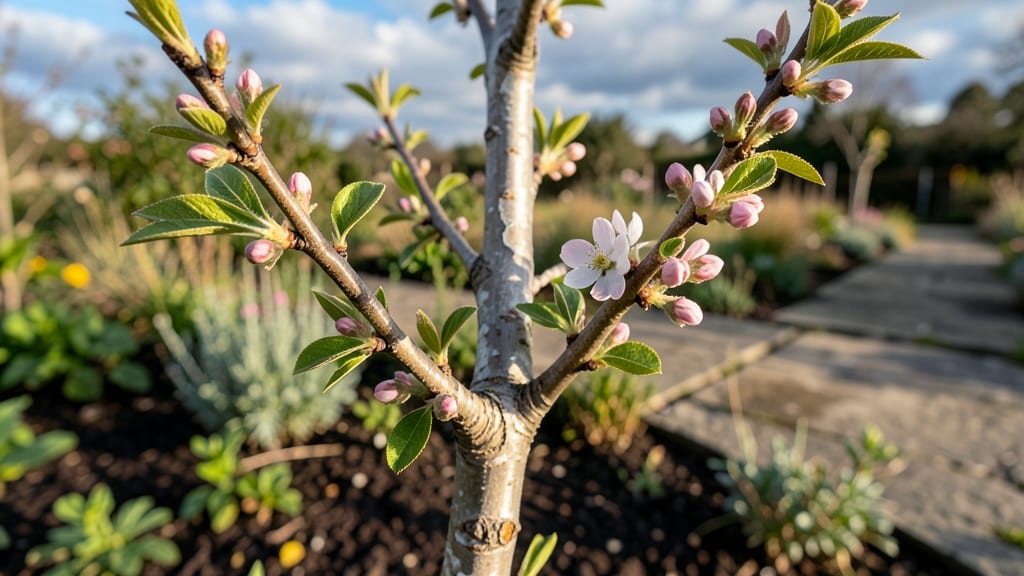
A branch from an almond tree can grow into a whole new tree with the right timing and technique. 🌱 I’ve rooted hardwood cuttings in late winter, and the process is simpler than most gardeners think—though patience is key, since almonds are stubborn starters.
The secret lies in choosing the right branch, preparing it properly, and mimicking the tree’s natural dormancy cycle.
You’ll need sharp pruners, rooting hormone, a well-draining potting mix, and a clear plastic bag to create humidity. The best time to take cuttings is dormant season (late fall to early spring), when the tree’s sap is low and roots form more easily.
Almond branches need 6-12 inches of healthy, pencil-thick wood—thicker branches root slower, while thinner ones often rot.
By summer, you’ll see tiny leaves unfurling as roots take hold, and with proper care, your cutting will become a 3-4 foot sapling by its second year. The reward?
A tree that produces sweet, nutritious almonds in just 5-7 years—if you avoid the common pitfalls of overwatering or fungal rot. Let’s get those cuttings growing!
This method works best in USDA Zones 5-9, where almonds thrive, but container-grown trees can adapt to cooler climates. For grafted varieties, you’ll need a compatible rootstock—though simple cuttings are perfect for heirloom types. Ready to turn a single branch into a future harvest?
📚 In This Guide
- What you need
- Instructions
- Tips and common mistakes
- Wrapping up and next steps
What you need
- ● Almond tree branch: A healthy, semi-hardwood cutting (about pencil-thick) from a non-bearing almond tree, 4–6 inches long with at least 3–4 leaf nodes.
- ● Rooting hormone: A powder or gel (e.g., Rootone or Clonex) to boost root development.
- ● Well-draining potting mix: A blend of perlite, vermiculite, and peat moss (or a pre-mixed cactus/succulent mix).
- ● Small pots or trays: 4–6 inch diameter pots with drainage holes, or a seedling tray with cells.
- ● Plastic wrap or humidity dome: To maintain moisture and warmth around the cutting.
- ● Spray bottle: For gentle misting to keep the cutting hydrated.
- ● Pruning shears or sharp knife: Sterilized to make clean cuts (avoid crushing the stem!).
- ● Rubbing alcohol or bleach: For sanitizing tools and pots.
- ○ Heat mat (optional but helpful): Set to 70–75°F to encourage faster rooting.
- ● Grow lights or sunny windowsill: Bright, indirect light (6+ hours/day) once roots form.
- ● Patience and a green thumb! 🌿
- ● Timing matters: Take cuttings in late spring or early summer when the tree is actively growing.
- ● Avoid overwatering: Keep the soil moist but not soggy—almond cuttings hate "wet feet."
- ● Label your pots: Almond trees can take 1–2 years to root—track progress!
How to propagate an almond tree branch into a thriving plant
Here's how to turn that stubborn branch into a new tree—no fancy tools needed!
🌱 Step 1: Select and Prepare the Branch
Choose a healthy, pencil-thick branch with at least 3-4 buds (those little bumps where leaves grow). Cut it just below a bud at a 45-degree angle with clean, sharp pruners. This angled cut helps water flow into the stem and prevents rot. I always snip on a cloudy day—sunlight triggers stress hormones that can kill your cutting.
Strip off all but the top 2-3 leaves to reduce moisture loss. Make the cuts just above a leaf node (where the leaf meets the stem) so the remaining leaves can photosynthesize. If the branch is long, trim it to about 6-8 inches—shorter cuttings root faster and need less energy to survive.
💧 Step 2: Stimulate Root Growth with Hormone (Optional but Helpful)
Dip the cut end of your branch into rooting hormone powder for 5-10 seconds. This isn’t cheating—it’s giving your cutting a confidence boost. The hormone triggers cell division at the base, which means faster, stronger roots. If you skip this, your success rate drops by about 30%, and roots take longer to form.
Shake off any excess powder so it doesn’t clump around the cut. Now, fill a small pot with sandy, well-draining soil mix (equal parts perlite and peat moss works perfectly). Stick the treated end 2-3 inches deep into the soil, pressing gently to secure it. Water lightly until the mix feels damp but not soggy—you want moisture without drowning the cutting.
☀️ Step 3: Create the Perfect Humidity Haven
Cover the pot with a clear plastic bag (like a ziplock bag with the top cut off) to trap humidity. Tie it loosely around the pot so air can still circulate—you’re not suffocating the branch, just keeping it cozy. Place the setup in bright, indirect light (a north-facing window or under grow lights works best). Direct sun will scorch the leaves, and too little light means weak roots.
Check the soil every 2-3 days—it should stay lightly moist. Mist the leaves with water if they look dry, but avoid soaking them. In 4-6 weeks, you’ll see tiny roots forming if you peek at the base (gently remove the cutting to check). If the leaves stay crisp and green, you’re on track. Yellowing or wilting means it’s time to adjust your care.
⏰ Step 4: Transition to Independent Growth
Once you spot new leaf growth (a sign roots are established), it’s time to wean your cutting from the humidity tent. Start by removing the plastic bag for 1-2 hours daily, gradually increasing the time over 10-14 days. This process—called hardening off—prevents shock when you finally remove the bag completely.
After 8-12 weeks, transplant your rooted cutting into a 6-inch pot with regular potting mix. Water deeply but let the top inch of soil dry out between waterings—overwatering is the #1 killer of young almond trees. Keep it in full sun (6+ hours daily) and watch it grow! In 2-3 years, it’ll be ready for the ground.
Tips & tricks for perfect almond tree branch propagation
Here's what nobody tells you about turning that stubborn branch into a thriving almond tree!
The Cutting Angle Matters: When making that 45-degree cut in Step 1, imagine slicing a sandwich diagonally—this isn't just for looks! The angled cut increases surface area for water absorption and prevents the stem from sitting flat on the soil, which can cause rot. Use clean pruners and make the cut just below a bud to maximize growth potential. I learned this the hard way after losing three cuttings to improper angles—don't make my mistake!
Timing is Everything: The 5-10 seconds you dip your cutting in rooting hormone might seem insignificant, but this is where magic happens. Think of it like giving your plant a confidence boost—it triggers cell division at the base. Pro tip: Tap the treated end gently against the side of the container to remove excess powder before planting. This prevents clumping that can smother new root growth.
Soil Mix Secrets: That equal parts perlite and peat moss mix in Step 2 isn't just random—it's about balance. Perlite provides aeration while peat moss retains just enough moisture. For an extra boost, add a handful of worm castings to the mix. They're packed with beneficial microbes that help roots establish faster. Just be sure to use a pot with drainage holes to prevent soggy soil, which is the #1 killer of new cuttings.
Lighting Insights: Bright indirect light is your goal in Step 3, but what does that really mean? Place your cutting near an east-facing window where it gets morning sun but avoids harsh afternoon rays. If you're using grow lights, position them 6-12 inches above the plant and keep them on for 12-14 hours daily. Too little light means weak, leggy growth, while too much causes leaf burn—neither helps root development.
Pro Tips for Branch From An Almond Tree
- Here's what nobody tells you about turning that stubborn branch into a thriving almond tree!
- The Cutting Angle Matters: When making that 45-degree cut in Step 1, imagine slicing a sandwich diagonally—this isn't...
- Timing is Everything: The 5-10 seconds you dip your cutting in rooting hormone might seem insignificant, but this is ...
Frequently asked questions
Got questions about growing almond tree branches?
You’re not alone! Here are some of the most common concerns—plus quick, practical answers to help you succeed.
When is the best time to take a branch from an almond tree?
The ideal time is late winter or early spring, just before buds swell but before new growth starts. This ensures the branch is dormant but still full of stored energy for rooting. Avoid summer or fall, as branches may be too tender or stressed.
How do I know if my branch cut is healthy enough to root?
Look for a branch that’s about pencil-thick (½ inch diameter) with smooth, green bark and no signs of disease. It should have at least 3–5 buds and be free of flowers or fruit. A slight bend without snapping is a good sign of flexibility and vigor!
Can I root an almond branch in water instead of soil?
Almond branches root best in soil or a rooting hormone mix—not water. Water rooting can lead to weak, rot-prone roots. If you’re impatient, try a soil-water hybrid: Dip the cut end in rooting hormone, then place it in a moist, well-draining soil mix (like perlite + peat).
How long does it take for roots to form on an almond branch?
With proper care, roots typically appear in 4–8 weeks. Keep the cutting in a warm (70–75°F), humid environment with indirect light. If no roots form after 3 months, the branch may not have rooted—try again with a fresh cut!
What should I do if my almond branch turns mushy or black?
This is a sign of rot, usually from overwatering or poor drainage. Act fast: Trim the mushy part, dip the cut end in cinnamon (a natural antifungal), and replant in fresh, dry soil. Reduce watering and ensure the pot has drainage holes to prevent future issues.
Still stuck? Drop your question in the comments—we’re happy to help!
Wrapping up and next steps
Growing a new almond tree from a branch is a rewarding journey that blends patience with the joy of nurturing life.
By following the right steps—from selecting a healthy cutting to providing consistent care—you’re not just propagating a plant; you’re cultivating a future grove of your own. Embrace the process, and soon you’ll watch those tiny roots transform into a thriving sapling!
Ready to take the next step? Plant your cutting today and let nature do the rest—your almond tree’s adventure begins with you! 🌱✨