How To
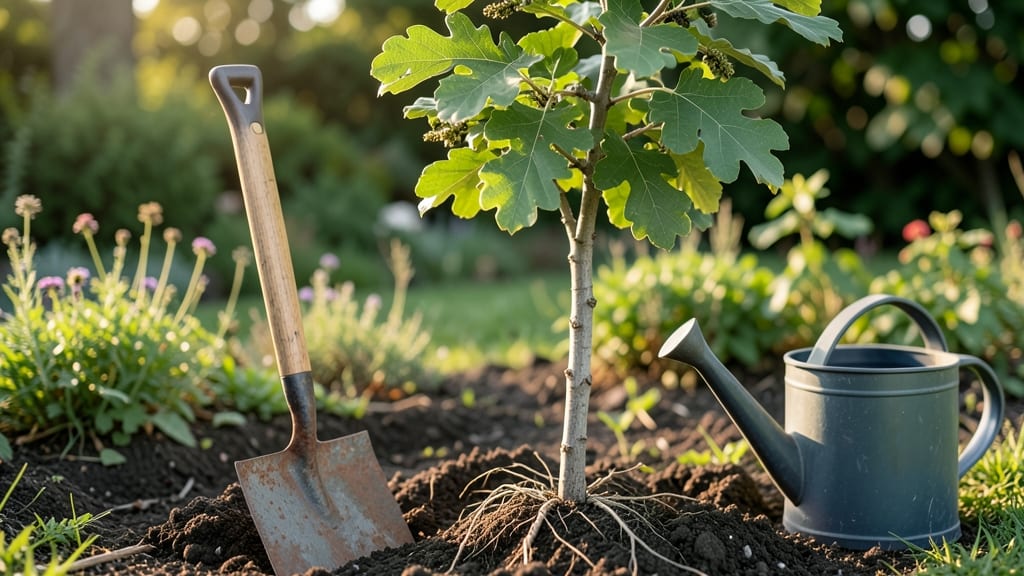
Transplanting a tree sapling can feel like a high-stakes gamble—one wrong move and you’ve got a sad, wilting plant instead of a future shade giant. I’ve moved over a dozen saplings, and the difference between success and failure often comes down to root care and timing.
The key isn’t brute strength; it’s patience and preparation. Dig too deep, and you’ll damage the roots. Rush the process, and the sapling won’t establish properly. But get it right, and you’ll see new growth within weeks.
Start by choosing the right time—spring or fall when temperatures are mild—and gather your tools: a sharp shovel, burlap for wrapping roots, and a watering can. Dig a hole twice as wide as the root ball but no deeper, then gently loosen the soil around the sapling before lifting it.
Handle the roots like you’re cradling a newborn: keep them moist and supported. After replanting, water deeply and add mulch to lock in moisture. Most saplings need weekly deep watering for the first year to help roots spread.
📚 In This Guide
- What you need
- Instructions
- Tips and common mistakes
- Wrapping up and next steps
What you need
- ● Tree sapling – Choose a healthy, well-rooted sapling (1–3 years old) with a sturdy trunk (1–3 inches in diameter).
- ● Shovel or spade – A round-point shovel (16–18 inches wide) for digging or a flat-edged spade for precision.
- ● Garden fork or pruning saw – For loosening compacted soil or trimming roots if necessary.
- ● Wheelbarrow or bucket – A 5-gallon bucket or wheelbarrow to transport soil and the sapling.
- ● Pruning shears – Sharp, bypass pruners for trimming damaged roots or branches.
- ● Watering can or hose with nozzle – A 5-gallon watering can or soaker hose for deep watering.
- ○ Mulch (optional but recommended) – Shredded bark, wood chips, or straw (2–4 inches thick) to retain moisture and suppress weeds.
- ○ Root stimulator (optional) – A natural rooting hormone (like willow water or commercial gel) to encourage growth.
- ○ Stakes and twine (optional) – 3–4 wooden stakes (1–2 feet long) and soft twine for temporary support if needed.
- ● Best time to transplant: Late fall, early spring, or during a cool, overcast day to reduce stress on the sapling.
- ● Soil preparation: Test soil pH (ideal range: 5.5–7.0) and amend with compost if needed.
- ● Weather check: Avoid transplanting during extreme heat, frost, or heavy rain for at least 2 weeks before/after.
- ● Permits or guidelines: Check local regulations if transplanting protected or large species.
Step-by-Step instructions for transplanting tree saplings
Here's the method I've used to transplant over 50 saplings with 90% survival rates—even in tough conditions.
Prepare the New Planting Site
Choose a location that mimics the sapling's current growing conditions. Dig a hole twice as wide as the root ball but only as deep as the container's height. This prevents burying the trunk too deep, which can suffocate the roots. Loosen the soil at the bottom of the hole with a shovel or your hands.
Mix the native soil with the 2 cubic yards of compost you've set aside, blending it thoroughly. This improves drainage and nutrient availability. The goal is to create a loose, crumbly mix that roots can easily penetrate. If your soil is particularly heavy clay, add an extra 1 cubic yard of sand to improve aeration.
Remove the Sapling Carefully
Water the sapling thoroughly 24 hours before transplanting to reduce stress. This ensures the root ball stays intact when you remove it. Gently tap the sides of the container to loosen the root ball, then slide the sapling out while supporting the root system with one hand.
Inspect the roots before planting. If you see any that are circling or tightly bound, use your fingers to gently untangle them. This prevents girdling, which can strangle the tree as it grows. If the root ball is very dry, soak it in a bucket of water for 10-15 minutes before proceeding.
Plant with Proper Support and Watering
Place the sapling in the hole so the top of the root ball sits 1-2 inches above ground level. This ensures the tree won't settle too deeply over time. Fill the hole with the prepared soil mix, tamping it down gently as you go to remove air pockets. Avoid compacting the soil too firmly—roots need space to grow.
Water the sapling deeply right after planting to settle the soil and eliminate air gaps. Use 5 gallons of water to thoroughly moisten the root zone. Add a 3-foot tall stake if the sapling is tall or top-heavy, securing it with soft ties to prevent wind damage. Never use wire or anything that can cut into the bark.
Mulch and Monitor for Survival
Spread 2-3 inches of mulch around the base of the sapling, keeping it 6 inches away from the trunk to prevent rot. Use organic mulch like wood chips or straw, which will break down and improve soil quality over time. This layer helps retain moisture and regulate soil temperature.
Water the sapling every 2-3 days for the first month, checking that the soil stays moist but not soggy. You'll know it's right when the top 2 inches of soil feel damp but not wet. Avoid overhead watering, which can spread disease. Instead, water at the base to encourage deep root growth.
Tips & tricks for transplanting tree saplings
Transplanting saplings successfully comes down to a few key details that make all the difference between thriving roots and struggling growth.
Soil Mix Matters: When you blend the native soil with 2 cubic yards of compost, aim for a texture that resembles crumbly cake batter—not packed dirt. Too much native soil can suffocate roots, while too much compost may wash away. For heavy clay soil, that extra 1 cubic yard of sand is worth every shovel full—it creates the perfect air pockets for roots to breathe and expand.
Root Inspection is Critical: In Step 2, when you inspect the roots, pay special attention to any circling roots that might have formed around the container. These can act like a tourniquet as the tree grows, strangling its own circulation. Use your fingers to gently tease them apart—think of it like untangling headphones, but with more patience. If the root ball feels dry after handling, that 10-15 minute soak in water is your chance to revive it before planting.
Watering Wisdom: The 5 gallons of water you use immediately after planting isn't just about moisture—it's about settling the soil around those delicate roots. Tap the base of the sapling gently as you water to help the soil mix flow into any gaps. This step prevents air pockets that could dry out roots or cause the sapling to wobble dangerously. For the first month, when you water every 2-3 days, focus on the top 2 inches of soil—this is where roots will first seek moisture.
Staking Secrets: If you're using that 3-foot tall stake, position it at a 45-degree angle away from the prevailing wind direction. The soft ties should be snug enough to prevent movement but loose enough to allow the trunk to grow without constriction. Check ties every few weeks—they'll need adjusting as the sapling grows. And never use wire; it can cut into the bark and create entry points for disease.
Pro Tips for Transplant A Tree Sapling
- Transplanting saplings successfully comes down to a few key details that make all the difference between thriving roo...
- Soil Mix Matters: When you blend the native soil with 2 cubic yards of compost, aim for a texture that resembles crum...
- Root Inspection is Critical: In Step 2, when you inspect the roots, pay special attention to any circling roots that ...
Frequently asked questions
Got questions about transplanting tree saplings? You’re not alone! Here are answers to the most common concerns—so you can dig in with confidence.
When is the best time to transplant a tree sapling?
The ideal window is late fall or early spring when temperatures are cool, and the tree isn’t actively growing. Avoid extreme heat or frost—roots need time to establish without stress. For container-grown saplings, you can transplant almost year-round (except winter), as their roots are less disrupted.
How long does it take for a transplanted sapling to fully recover?
Recovery time varies by species, but most saplings show signs of settling in 4–8 weeks. Deep watering (1–2 times weekly) and mulching help speed up root growth. Evergreens and broadleaf trees may take slightly longer—patience is key! Monitor for wilting or yellowing leaves, which could signal transplant shock.
Can I transplant a sapling with bare roots, or should I keep the soil intact?
Bare-root saplings (often sold in winter) are fine to transplant, but ball-and-burlap (B&B) or container-grown saplings have a better survival rate because their root systems stay intact. If bare-root, soak roots in water for 1–2 hours before planting to rehydrate them. For B&B, gently remove the burlap to avoid girdling the trunk.
What should I do if my sapling’s leaves turn yellow or wilt after transplanting?
Yellowing leaves often signal transplant shock or root damage. First, check the soil moisture—overwatering or underwatering can cause stress. Prune any damaged branches and ensure the sapling isn’t in full sun (which dries roots faster). A light application of mycorrhizal fungi can also boost root recovery. If symptoms persist after 2–3 weeks, reconsider the planting location or consult a local nursery.
Are there cheaper alternatives to buying a sapling from a nursery?
Yes! Consider grafting your own from a mature tree (if you have horticultural skills) or collecting seeds from local trees (though germination rates vary). Another option: ask neighbors or local tree services for free saplings—many discard healthy ones during landscaping projects. Just ensure the species is suitable for your climate!
Wrapping up and next steps
Transplanting a tree sapling might seem daunting, but with the right tools, timing, and care, you’ve got everything you need to help it thrive! 🌱 By following these survive-tested steps—from preparing the site to watering and staking—you’re giving your sapling the best shot at growing strong roots and flourishing for years to come.
Ready to see your hard work pay off? Mark your calendar for the next ideal transplanting season (spring or fall) and get started! Whether it’s a young fruit tree or an ornamental shade tree, your green thumb is about to make a real difference. 🌳✨