Pruning
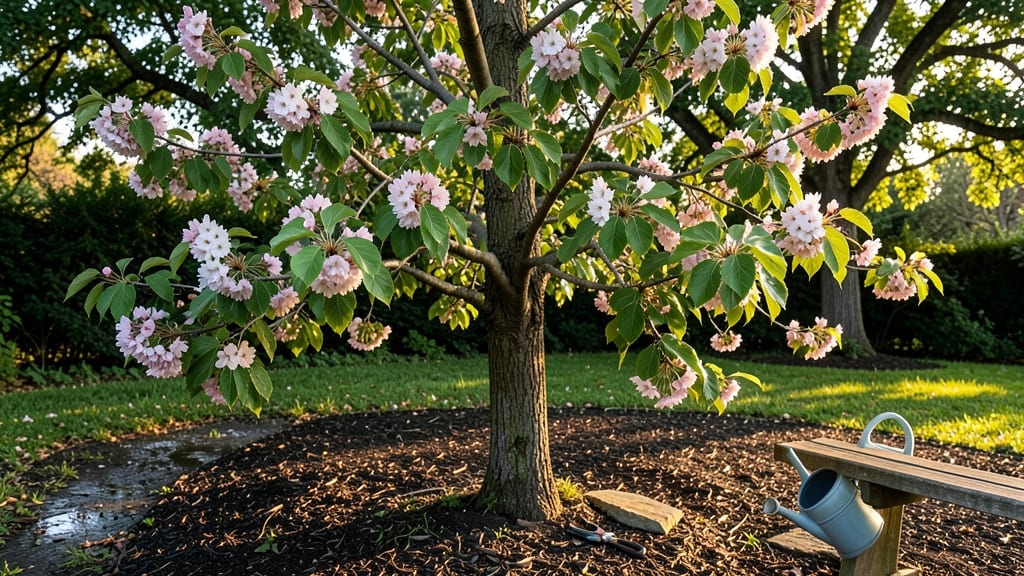
These cherry tree photos I’ve captured over the years prove how Pacific Northwest varieties steal every season—from pink clouds of spring blossoms to fiery autumn foliage and sculpted winter bark. 🌸 I’ve spent years photographing these trees in their natural glory, and the way they transform a garden makes them worth every ounce of care.
Their delicate petals turn into glossy green canopies by summer, then burst into fiery reds and oranges before winter’s first frost.
Ornamental varieties like 'Kwanzan' or 'Stella Compact' offer nonstop drama, while fruit-bearing trees add harvests of sweet cherries. The secret to their beauty? Planting them where they get 6+ hours of morning sun and well-drained soil—no heavy clay.
Pair them with hostas for shade, lavender for fragrance, or boxwoods for structured contrast.
You’ll end up with a garden that feels like a living painting—each season bringing a new masterpiece. The blossoms attract bees, the foliage provides shade, and the bark adds winter interest. Even pruning becomes an art when you time it right (late winter, before buds swell).
Perfect for cottage gardens, Japanese-inspired landscapes, or even urban courtyards. These trees aren’t just plants; they’re the backbone of a garden that changes with the light and seasons. Ready to make yours unforgettable?
📚 In This Guide
- What you need
- Instructions
- Tips and common mistakes
- Wrapping up and next steps
What you need
- ● Camera: DSLR, mirrorless, or high-end smartphone (with manual controls for best results).
- ● Lenses: Wide-angle lens (16-35mm) for sweeping canopy shots.
- ● Telephoto lens (70-200mm) for close-ups of blossoms or bark details.
- ● Macro lens (100mm+) for intricate textures like buds or fallen petals.
- ● Tripod: Sturdy, lightweight model (with a fluid head for smooth panning).
- ● Remote shutter: 2-3 second timer or wireless remote to avoid camera shake.
- ● Memory cards: 32GB+ (fast write speed, Class 10 or UHS-I).
- ● Extra batteries: 2-4 fully charged spares (PNW weather can drain them fast!).
- ● Polarizing filter: Reduces glare and enhances vibrant colors in blossoms.
- ● ND filters: For long-exposure shots of cherry trees in wind or water.
- ● Reflector: 5-in-1 collapsible reflector to brighten shadows on cloudy days.
- ● Pruning shears: If you’re capturing post-pruning shots (small, sharp bypass shears).
- ● Weatherproof bag: To protect gear during rain or dew.
- ● Portable charger: 20,000mAh+ for extended outdoor sessions.
- ● Research: Scout cherry tree locations (e.g., Prunus serotina or Prunus avium) in advance—PNW hotspots include blank">Mount Rainier or blank">Stanwood.
- ● Weather check: Aim for overcast days (soft light) or golden hour (early morning/late afternoon).
- ● Permissions: Confirm access to private properties or parks.
- ● Editing software: Lightroom, Photoshop, or free alternatives like Darktable for post-processing.
How to capture stunning cherry tree photos in the Pacific Northwest
Here's how I frame the perfect shots—season after season—without needing fancy gear.
🌿 Step 1: Scout Locations for Seasonal Canopy Beauty
Start by visiting local parks or botanical gardens where Pacific Northwest cherry trees thrive—think places like Seattle's Discovery Park or Portland's Washington Park. Spring is your golden hour for blossoms, but summer and fall offer lush foliage and dramatic shadows. I always check the tree's height and surrounding landscape to plan my shot composition.
Look for trees with unique branching patterns or those positioned near water features, as reflections add depth. Early morning light (before 10 a.m.) or late afternoon (after 4 p.m.) creates soft shadows and warm tones—ideal for capturing the tree's texture. If you're photographing in winter, seek trees with peeling bark or persistent buds for texture contrast.
☀️ Step 2: Adjust Settings for Light and Weather Conditions
Use aperture priority mode (f/8-f/11) to keep the entire tree in focus from trunk to canopy. For spring blossoms, a slightly lower ISO (100-400) prevents graininess, while overcast days in summer may require a wider aperture (f/4-f/5.6) to brighten the scene. I always shoot in RAW to preserve details for editing later.
Watch for Pacific Northwest's signature mist or rain—these elements add drama. If photographing during rain, use a weather-sealed camera and a fast shutter speed (1/500s or faster) to freeze droplets. For foggy mornings, a polarizing filter reduces glare and enhances the ethereal quality of the scene.
📸 Step 3: Frame Shots for Canopy Depth and Seasonal Details
Begin with a wide-angle shot (16-35mm lens) to capture the entire tree and its surroundings. Move closer for macro details—like individual blossoms or bark texture—using a 50mm or 85mm lens. Include foreground elements (like wildflowers or garden tools) to create depth and context. I often shoot from a low angle to emphasize the tree's height and grandeur.
For seasonal variety, include small details that tell a story: a bird perched in spring, autumn leaves clinging to branches, or winter snow dusting the branches. Shoot at different times of day to capture how light changes the tree's appearance—morning light is cooler, while afternoon light adds warmth.
✂️ Step 4: Edit for Pacific Northwest Atmosphere
Use editing software like Lightroom or free tools like Darktable to enhance the moody, natural tones of the Pacific Northwest. Boost shadows slightly to retain texture, and adjust whites to preserve the tree's natural color. I often apply a subtle cool tone (7000K-7500K) to mimic overcast skies, which is common in the region.
Crop images to emphasize the tree's structure or seasonal highlights—like a cluster of blossoms or a single autumn leaf. Avoid over-editing; the goal is to highlight the tree's natural beauty, not alter it. Save a few unedited shots for comparison to ensure authenticity.
🌱 Step 5: Organize and Share Your Cherry Tree Gallery
Create a dedicated folder for your cherry tree photos and name it by season (e.g., "PNW Cherry Trees - Spring 2024"). Include keywords like "Pacific Northwest cherry blossoms" or "evergreen canopy" for easy searching. I also add a short description for each photo—like the location, date, and camera settings—to track my progress.
Share your photos on platforms like Instagram or local gardening groups to connect with fellow enthusiasts. Use relevant hashtags (#PNWGardens, #CherryTreeSeason) to reach a wider audience. Over time, you'll build a stunning visual journal of the cherry tree's ever-changing beauty.
Tips & tricks for perfect cherry tree photos
Here's what nobody tells you about capturing Pacific Northwest cherry trees that truly stand out.
Seasonal Lighting Secrets: In Step 1, when scouting locations, remember that Pacific Northwest skies often bring soft, diffused light—your greatest ally. For spring blossoms, shoot during the "golden hour" (before 10 a.m. or after 4 p.m.) when light is warmest. In summer's overcast conditions, use a wider aperture (f/4) to brighten your scene without losing detail. I've found that autumn's golden light creates the most dramatic contrasts for foliage shots.
Equipment Workarounds: Don't have a polarizing filter for those foggy mornings in Step 2? Try this trick: shoot through a pair of polarized sunglasses held in front of your camera lens. It won't be perfect, but it'll reduce glare enough to enhance those ethereal Pacific Northwest scenes. For rain shots, if you don't have a weather-sealed camera, cover your camera with a large plastic bag (cut off the bottom) and secure it tightly—just be sure to wipe away any water droplets before shooting.
Composition Pro Tips: When framing your shots in Step 3, look for leading lines created by tree branches or paths that draw the eye into your image. I always include at least one element in the foreground—like a garden tool or wildflower—to create depth. For winter shots, try shooting from a slightly elevated position (like a low branch or small stool) to capture the tree against the sky, emphasizing its height and grandeur.
Editing Shortcuts: In Step 4, if you're new to editing, start with these simple adjustments: boost shadows by +20 to reveal texture, increase highlights by +10 to preserve detail, and apply a slight vignette to draw attention to the center of your image. For that signature Pacific Northwest cool tone (7000K-7500K), try this: reduce the temperature slider by 500K in your editing software—it'll give you that misty, atmospheric look without overdoing it.
Pro Tips for Cherry Tree Photos
- Here's what nobody tells you about capturing Pacific Northwest cherry trees that truly stand out.
- Seasonal Lighting Secrets: In Step 1, when scouting locations, remember that Pacific Northwest skies often bring soft...
- Equipment Workarounds: Don't have a polarizing filter for those foggy mornings in Step 2? Try this trick: shoot throu...
Frequently asked questions
about capturing the stunning beauty of Pacific Northwest cherry trees in photos—whether for inspiration, pruning guides, or seasonal transformations.When is the best time to photograph cherry trees in the PNW?
The absolute best time is late April to early May during peak bloom, when pink and white blossoms create a breathtaking canopy. For fall foliage, aim for September-October when leaves turn fiery reds and oranges. Winter shots (Dec-Feb) offer stark, artistic silhouettes against snow.
What camera settings work best for cherry tree photos?
Use aperture priority (f/8-f/11) for sharpness, a low ISO (100-400) to avoid grain, and shutter speed 1/250s or faster to freeze motion. For blooms, try a macro lens (100mm+) to highlight delicate petals. Pro tip: Shoot in _RAW_ for better editing flexibility!
Can I use my smartphone for cherry tree photos?
Modern smartphones (iPhone 13+, Google Pixel 7+) have 4K video, HDR, and wide-angle lenses that capture stunning shots. Enable gridlines for composition, and use apps like Lightroom Mobile or Snapseed for quick edits. Just avoid zooming—move closer instead!
How do I prune cherry trees without ruining their photo-worthy shape?
Prune dormant trees (late winter) to remove dead, crossing, or overcrowded branches—never cut more than 25% of the canopy at once. Use clean, sharp tools and seal cuts with pruning paste to prevent disease. Never prune during bloom or you’ll sacrifice next year’s photos!
What should I do if rain ruins my cherry tree photo shoot?
Rain can add dramatic texture to photos—try close-ups of raindrops on petals or moody, low-light shots. If skies are gray, use a polarizing filter to enhance colors. For post-processing, boost contrast and saturation in Lightroom to brighten the scene.
Wrapping up and next steps
From the delicate blossoms of spring to the fiery foliage of autumn, cherry trees in the Pacific Northwest are a year-round spectacle.
Whether you're a gardener, photographer, or simply a nature lover, these trees offer endless inspiration—and now you’re equipped with the knowledge to capture their beauty in photos.
Ready to turn your lens to these stunning canopies? Grab your camera, head outdoors, and let the magic of cherry trees frame your next masterpiece! 🌸📸