Landscaping
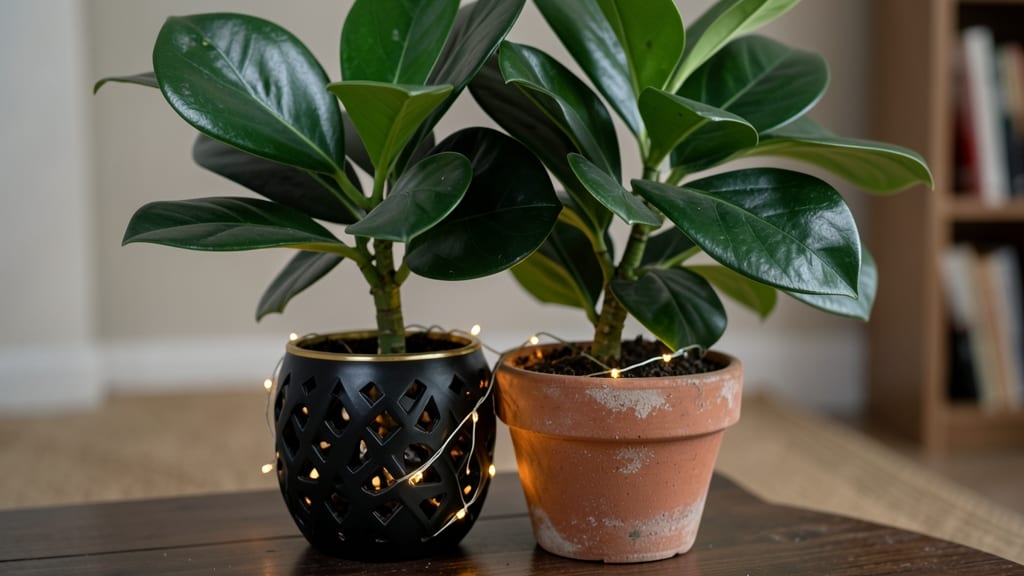
Decorating a small tree can turn a bare trunk into a stunning vertical garden that steals the show in tiny spaces. 🌿 I learned this trick after struggling with a cramped patio—what looked like wasted space became a lush, eye-catching focal point with just a few simple additions.
The key is balancing aesthetics with the tree’s health, so every decoration actually helps it thrive while making your space feel bigger.
Start with lightweight hanging planters filled with trailing plants like ferns or ivy, which soften the tree’s silhouette and add layers of greenery. Wrap the trunk with solar-powered LED string lights for a magical glow, or use woven baskets to tuck in air plants or small succulents.
Even a simple coat of natural bark paint can refresh an older tree while keeping it looking organic. The best part? These ideas work for any small tree—dwarf fruit trees, bonsai, or even a young ornamental variety.
You’ll end up with a tree that feels like a miniature forest, complete with dappled light and textures that draw the eye upward. The planters and decor not only enhance the tree’s beauty but also create microclimates that keep it healthy—more moisture retention, better airflow, and even natural pest deterrents.
Plus, the vertical space illusion makes your garden feel twice as big without adding a single square foot.
Whether you’re working with a balcony tree or a backyard specimen, these techniques adapt easily. The only rule? Keep decorations lightweight and avoid anything that could smother the trunk. Now, let’s turn that small tree into the star of your space—without sacrificing a single inch of growing room.
📚 In This Guide
- What you need
- Instructions
- Tips and common mistakes
- Wrapping up and next steps
What you need
- ● Small Tree: A dwarf tree (e.g., Japanese maple, citrus, or olive) or a bonsai (3–6 feet tall).
- ○ Optional: A pre-potted tree with a decorative container (ceramic, terracotta, or metal).
- ● Soil & Planting Supplies: Well-draining potting mix (5–10 gallons, depending on tree size).
- ● Slow-release fertilizer (e.g., osmocote or fish emulsion).
- ● Perlite or sand (1–2 cups for drainage).
- ○ Optional: Mulch (1–2 inches) for moisture retention.
- ● Decorative Elements: Miniature garden ornaments (e.g., fairy lights, tiny wind chimes, or mosaic tiles).
- ● Paint or chalk (non-toxic, for tree trunks or containers).
- ● Pebbles, moss, or decorative rocks (1–2 lbs for ground cover).
- ○ Optional: Themed accents (e.g., whimsical toadstools, mini benches, or solar-powered figurines).
- ● Tools: Trowel or small shovel.
- ● Pruning shears (for shaping).
- ● Spray bottle (for misting).
- ● Measuring tape (to plan spacing).
- ○ Optional: Hot glue gun (for securing lightweight decorations).
- ● A sunny or partially shaded spot (check your tree’s light needs!).
- ● Access to water (a drip irrigation system or watering can works).
- ● Basic DIY skills (or a friend who loves crafting!).
- ● Pro Tip: If indoors, ensure your space has adequate humidity (pebble trays help!).
Step-by-Step guide to creating vertical garden illusions with small trees
Turn a tiny tree into a stunning focal point with these creative techniques.
🌿 Step 1: Choose the Right Tree and Location
Select a small tree with a naturally attractive shape—dwarf varieties or bonsai work perfectly. Look for one with a sturdy trunk and branches that spread evenly. Place it in a spot that gets at least 4-6 hours of sunlight daily, but avoid harsh afternoon sun that can scorch delicate foliage.
I always test the location by holding the tree pot in place for a few minutes. If the space feels cramped, the tree will look crowded later. A small tree needs breathing room—aim for at least 12 inches of clearance on all sides for proper air circulation. If your space is extremely tight, opt for a tree with fine foliage or a more compact growth habit.
🪴 Step 2: Prepare the Base and Surroundings
Use the garden pot you’ve chosen to create a clean, polished base. Fill it with 3 gallons of lightweight potting mix and water it thoroughly before planting. The pot should be slightly larger than the tree’s root ball to allow for growth without overwhelming the space. Place a layer of landscape fabric over the drainage holes to prevent soil from washing out.
Arrange 4-6 small decorative stones or pebbles around the base of the tree to define the planting area and add visual interest. These can be painted or left natural, depending on your style. I like to use smooth river rocks because they reflect light and make the tree stand out. Avoid placing them too close to the trunk—keep them at least 2 inches away to prevent moisture buildup.
☀️ Step 3: Add Vertical Elements for Height and Texture
Attach vertical garden panels or wall-mounted planters to the wall behind or beside the tree to create the illusion of depth. Use L-shaped brackets to secure them at a 45-degree angle if possible, which adds dynamic movement to the space. Fill these panels with succulents, ferns, or trailing plants like string of pearls to soften the vertical lines.
For an instant lift, drape air plants (tillandsias) along the branches or hang them from macramé hangers. These plants require minimal care and add layers of greenery without taking up floor space. If your tree has low-hanging branches, tuck small moss balls or miniature orchids into the crevices for a whimsical touch. The key is to mix textures—smooth leaves, trailing vines, and bushy foliage all contribute to a lush, dimensional look.
✂️ Step 4: Prune and Shape for a Polished Look
Use bypass pruning shears to trim any leggy or overgrown branches to encourage bushier growth. Focus on shaping the tree so it fills out evenly—cut back 1/3 of the longest branches to promote new growth. Avoid heavy pruning in one session; instead, do it gradually over 2-3 weeks to reduce stress on the tree.
Here’s the thing—small trees can look awkward if they’re too sparse. If your tree has bare spots, gently weave in smaller branches from a similar species or use floral wire to attach artificial greenery temporarily until the tree fills in. For a finished look, dust the foliage lightly with neem oil spray to add a subtle sheen and protect against pests.
💧 Step 5: Maintain and Refresh the Design
Water the tree 2-3 times per week, checking that the top 2 inches of soil feel dry before watering again. Small trees in containers dry out faster than those in the ground, so consistency is key. I set a reminder on my phone for the first few weeks to avoid forgetting. Overwatering is the biggest mistake—it leads to root rot and weakens the tree.
Every 4-6 weeks, rotate the tree a quarter turn to ensure even sunlight exposure on all sides. This prevents the tree from leaning toward the light and keeps it growing symmetrically. Refresh the decorative elements seasonally—swap out dried moss for fresh, or replace faded stones with new ones. A little seasonal updating keeps the illusion vibrant and alive.
Tips & tricks for perfect vertical garden illusions
These little details make all the difference when transforming a small tree into a showstopping vertical garden.
Lighting Strategy: The 4-6 hours of sunlight mentioned in Step 1 is non-negotiable, but here's the thing—morning sun is gentler than afternoon. Place your tree near an east-facing window if possible, or rotate it every 4-6 weeks to balance exposure. I've seen trees develop uneven growth when stuck in harsh afternoon light all season.
Base Design Hack: For that polished look in Step 2, I recommend using a pot slightly larger than the root ball—about 2-3 inches wider. This creates space for roots to grow without overwhelming the visual. Pro tip: Paint the pot's interior with a waterproof sealant before planting to prevent soil from staining ceramic or concrete surfaces.
Vertical Layering: When adding those vertical elements in Step 3, think about height progression. Start with taller plants at the bottom of your panels and work your way up to smaller foliage at the top. This creates natural depth and draws the eye upward. I like to use trailing plants like string of pearls near the edges to soften the vertical lines and make the whole arrangement feel more organic.
Pruning Precision: That 1/3 rule in Step 4 is gold, but here's what nobody tells you—always cut at a 45-degree angle just above a leaf node. This encourages new growth in the right direction. I also recommend pruning right after watering when the soil is moist; the tree handles the stress better. And if you're nervous about making mistakes, practice on a few branches first before tackling the main structure.
Pro Tips for Decorate A Small Tree
- These little details make all the difference when transforming a small tree into a showstopping vertical garden.
- Lighting Strategy: The 4-6 hours of sunlight mentioned in Step 1 is non-negotiable, but here's the thing—morning sun ...
- Base Design Hack: For that polished look in Step 2, I recommend using a pot slightly larger than the root ball—about ...
Frequently asked questions
Got questions about decorating a small tree?
Here are answers to the most common ones to help you create a stunning vertical garden without the stress!
What’s the best time of year to decorate a small tree?
For long-term decorations (like moss, climbing plants, or permanent ornaments), spring or early fall is ideal—when the tree is dormant but not in extreme heat or cold. If you’re using seasonal decor (like fairy lights or holiday ornaments), align with the theme (e.g., winter wreaths in December or spring flowers in April).
Can I use real plants or should I stick to artificial decor?
Both work! Real plants (like ivy, ferns, or succulents) add lushness but require care (watering, pruning). Artificial decor (fabric wraps, painted rocks, or plastic flowers) is low-maintenance and great for renters or dry climates. Mix them for a balanced look—just secure artificial pieces tightly to avoid wind damage.
How do I keep decorations from falling off or damaging the tree?
Use tree-friendly adhesives (like horticultural tape or non-toxic glue) for lightweight decor. For heavier items (like hanging planters), opt for zip ties, bungee cords, or sturdy hooks wrapped gently around branches. Avoid nails or screws—they can harm the tree. Pro tip: Test placement by gently tugging to ensure stability.
What are some low-maintenance decor ideas for a small tree?
Try these easy, durable options:
- Fabric wraps (burlap, lace, or patterned fabric) tied loosely around the trunk.
- Painted or stenciled designs on the bark (use eco-friendly paint).
- Pre-made tree sleeves (like those for holiday trees) for a polished look.
- Dried flowers or preserved leaves woven into branches.
- Solar-powered fairy lights for a magical glow (no wiring hassle!).
Will decorating my tree harm its growth or health?
Not if done right! Avoid tight, constricting materials (like wire) that can girdle the trunk. Choose breathable, non-toxic decor and remove anything that rubs against the bark. If using heavy ornaments, distribute weight evenly. Most trees tolerate decor well—just monitor for stress signs (wilting, discoloration) and adjust as needed.
Wrapping up and next steps
Decorating a small tree in tight spaces is all about creativity and smart planning!
With the right materials—like lightweight ornaments, vertical planters, and clever lighting—you can transform even the coziest corner into a lush, eye-catching display. Think outside the box (or pot!): mix textures, play with heights, and let your personality shine.
Ready to bring your vision to life? Start small: pick one tree or area to decorate first, then expand as you gain confidence. Your tiny space deserves a big, green statement—go ahead and make it happen! 🌿✨