Propagation
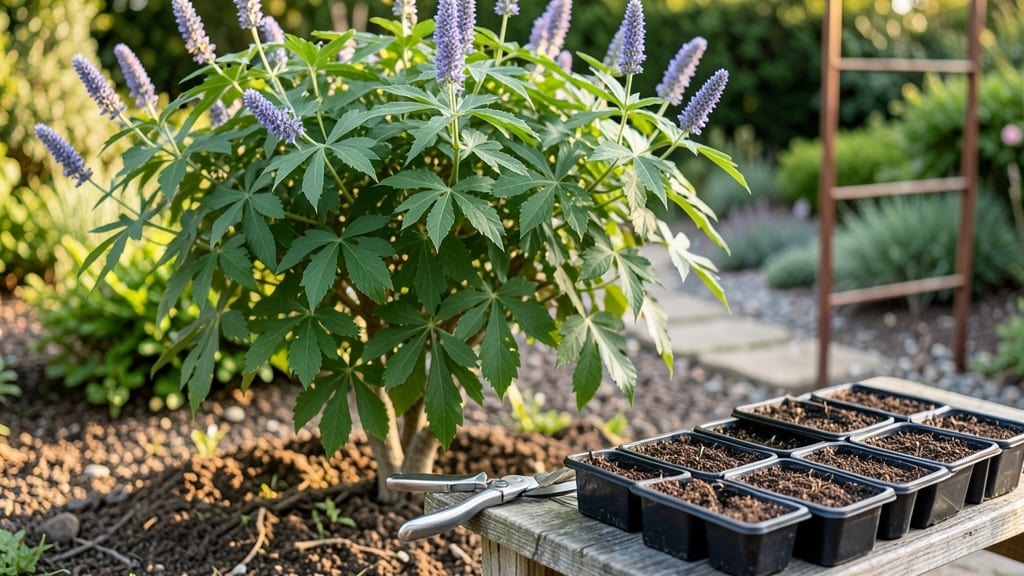
Propagating chaste tree through layering feels like unlocking a secret—no stress, no fuss, just reliable new plants. ✨ I’ve tried cuttings and seeds, but layering consistently gives me strong roots without the guesswork.
The key is timing: do it in early summer when the plant’s energy is high and the soil stays warm.
You’ll need sharp pruners, rooting hormone (optional but helpful), and a bit of patience—layering takes about 6-8 weeks for roots to form. The best part? You don’t even need to dig up the mother plant; just bend a low branch, make a small cut, and tuck it into the soil.
It’s foolproof for beginners and saves you from transplant shock.
What you end up with is a lush, established chaste tree with vibrant purple blooms and fragrant foliage. These plants thrive in full sun, attract pollinators, and even have medicinal uses—perfect for borders or cottage gardens. The best reward? Watching those roots take hold while the original plant keeps flowering.
Works in zones 5-9, though timing shifts slightly north or south. Layering is especially great for slow-rooting varieties. Here’s how to do it right the first time—no failed attempts!
📚 In This Guide
- What you need
- Instructions
- Tips and common mistakes
- Wrapping up and next steps
What you need
- ● Healthy Chaste Tree (Vitex agnus-castus) – A mature, well-established plant (3+ years old) with flexible, semi-woody stems.
- ● Sharp bypass pruners or clean garden shears – Sterilized to prevent disease (rubbing alcohol wipe works!).
- ○ Rooting hormone (optional but recommended) – A gel or powder (e.g., Rootone or Clonex) to boost success rates.
- ● Plastic or metal plant ties – Thin, stretchy strips (¼" wide) to secure layers without crushing stems.
- ● Moisture-retentive medium – Sphagnum moss or a mix of peat and perlite (keep it damp but not soggy).
- ● Clear plastic bag or propagation dome – To create a humid microclimate (e.g., a 1-gallon zip-top bag with holes).
- ● Small hand trowel or knife – For gently teasing roots or making clean cuts.
- ● Water spray bottle – For misting layers and maintaining humidity.
- ● Labeling tags & marker – To track varieties and propagation dates.
- ● Hormone-free alternative – Cinnamon powder (antifungal) for dipping cuts.
- ○ Heating mat (optional) – Speeds up rooting in cooler climates (set to 70–75°F).
- ● Fertilizer (diluted) – A weak seaweed or fish emulsion solution (1:10 ratio) after roots form.
- ● Grafting tape or rubber bands – For securing layers if ties aren’t stretchy enough.
- ● Propagation journal – To log progress, dates, and conditions for future reference!
Step-by-Step instructions for propagating chaste tree through layering
Here's how I've successfully multiplied chaste trees—no fancy tools, just patience and the right technique.
🌿 Step 1: Choose and Prepare the Perfect Stem
Select a healthy, flexible stem from this season's growth that's about 1/4 to 1/2 inch thick. Look for one that's at least 12-18 inches long with multiple leaf nodes—these are where roots will form. I always pick stems that aren't flowering yet, as they've got more energy for rooting.
Make a clean diagonal cut just above a leaf node using sharp pruners. The cut should be about 1/4 inch below the node—this is where new roots will emerge. Remove any leaves from the lower half of the stem to reduce moisture loss. Here's the thing—if you leave leaves on the buried section, they'll just rot before roots form.
💧 Step 2: Create the Layering Moisture Pocket
Bend the selected stem downward until the cut node touches the soil surface. For best results, I create a small trench about 2-3 inches deep and gently tuck the stem into it. Secure the stem in place using a U-shaped wire or a bent piece of rebar—this keeps it stable while roots develop.
Cover the buried section with 2-3 inches of moistened potting mix (not garden soil—it's too dense). Keep the soil consistently damp but never soggy. You'll know it's right when water runs through but doesn't pool. I like to use a spray bottle to mist the soil daily—this prevents the stem from drying out while encouraging root growth.
☀️ Step 3: Maintain Ideal Conditions for Root Growth
Place the layered stem in a location with bright, indirect light. Direct sun can scorch new growth, while too little light slows root development. I keep my propagation area near an east-facing window where it gets morning sun but stays shaded in the afternoon. If you're using a greenhouse or cold frame, maintain temperatures between 65-75°F—this is the sweet spot for chaste tree rooting.
Check the soil moisture every 2-3 days—the buried section should feel damp to the touch. If the soil surface dries out, give it a light misting. You'll know roots are forming when you see tiny green shoots emerging from the soil around the buried node. This usually takes 4-8 weeks, depending on your climate and humidity levels.
✂️ Step 4: Separate and Plant the New Rooted Cuttings
Once the layered stem develops a strong root system—you'll notice new growth at the top and roots emerging from the buried node—it's time to separate. Gently dig around the base to expose the roots, then carefully cut the stem just below the new root growth using sterilized pruners. This ensures you're not leaving any part of the parent plant behind.
Transplant the new cutting into its own 6-inch pot filled with well-draining potting mix. Water it thoroughly to settle the soil and encourage root establishment. Place it in a shaded area for the first 7-10 days to help it adjust. You'll know it's thriving when new leaves appear within 2-3 weeks—that's your signal that the roots have fully taken hold.
Tips & tricks for perfect chaste tree layering
Here's what nobody tells you about layering chaste trees that'll make all the difference between success and frustration.
Stem Selection is Everything: In Step 1, when choosing your stem, flex it gently—it should bend without snapping. I learned this the hard way after trying to layer a brittle stem that snapped mid-process. Also, avoid stems with any signs of disease or insect damage, no matter how tempting they look. You want a stem that's already proven its vitality through healthy foliage and flexible growth.
Root Formation Triggers: The key to encouraging roots in Step 2 is creating that perfect moisture pocket. After burying your stem, I like to add a handful of perlite to the soil mix—it helps maintain that crucial dampness while preventing compaction. The 2-3 inches of soil covering your node should stay consistently moist like a wrung-out sponge, not dripping wet. Too much moisture can suffocate the node, while too little will dry it out before roots form.
Light and Temperature Balance: During Step 3, that 65-75°F range is non-negotiable for root development. If your space runs cooler, consider a simple heat mat underneath the pot. I've found that placing my propagation setup on top of my refrigerator (which gives off gentle warmth) helps maintain that ideal range without needing fancy equipment. And remember—bright indirect light is your friend, but direct sun can create a greenhouse effect that overheats your cutting.
Separation Timing: When you're ready for Step 4, look for these visual cues: the buried node should have visible root growth (often white or pale yellow) and the top should show new leaf growth. I've seen people rush this step and pull cuttings too early—wait until you can see both root and shoot growth before separating. This ensures your new plant has the energy reserves to establish itself independently.
Pro Tips for Propagate Chaste Tree
- Here's what nobody tells you about layering chaste trees that'll make all the difference between success and frustrat...
- Stem Selection is Everything: In Step 1, when choosing your stem, flex it gently—it should bend without snapping. I l...
- Root Formation Triggers: The key to encouraging roots in Step 2 is creating that perfect moisture pocket. After buryi...
Frequently asked questions
Got questions about propagating your chaste tree (Vitex agnus-castus)? You’re not alone! Here are answers to the most common concerns—plus a few pro tips to set you up for success.
When is the best time to propagate chaste tree?
The ideal window is late spring to early summer (May–June), when temperatures are warm but not scorching. This gives young roots time to establish before winter. Avoid fall propagation—tender shoots won’t survive cold snaps. Pro tip: If you’re in a mild climate, early spring works too, but prioritize consistent moisture.
Why isn’t my layering method working?
Common culprits include poor contact between the stem and soil (use rooting hormone!), dry conditions (keep the area damp like a sponge), or immature stems (choose semi-ripe, pencil-thick branches). If roots fail to form after 3–4 months, try air-layering with moss—it traps humidity better. Troubleshoot: Check for pests (like spider mites) or fungal rot (prune affected areas).
Can I propagate chaste tree from seeds instead of cuttings?
Yes, but it’s slower and less reliable—seeds may take 1–2 years to mature into plants, and germination rates vary. For faster, identical clones, stick with layering or semi-hardwood cuttings. If you’re curious, stratify seeds (mix with moist sand, refrigerate for 4–6 weeks) to mimic winter conditions and boost success.
How do I know if my new plant is ready to transplant?
Your layered cutting is ready when it has 2–3 inches of healthy white roots and new growth at the tip. Gently tug—if resistance meets your fingers, it’s rooted! Transplant on a cloudy day to reduce stress, and water deeply afterward. Watch for: Wilting (overwatering) or yellow leaves (underwatering or shock).
What’s the best alternative if layering fails?
Try semi-hardwood cuttings (taken in late summer): Dip 4–6-inch stems in rooting hormone, plant in perlite/sand mix, and cover with a plastic bag to retain humidity. Alternatively, divide mature plants in spring—just ensure each section has roots and shoots. Bonus: Chaste tree responds well to grafting if you’re ambitious!
Wrapping up and next steps
Propagating a chaste tree through layering is a rewarding way to expand your garden without stressing the plant! 🌱 With the right timing, tools, and patience, you’ll soon have thriving new plants rooted and ready to thrive.
Remember, consistency is key—whether you’re air-layering or simple layering, keep those nodes moist and protected until roots form.
Now that you’re armed with the secrets to success, why not try it today? Grab your chaste tree, follow the steps, and in no time, you’ll be celebrating fresh growth. Happy propagating—your future garden awaits! 🌿✨