Propagation
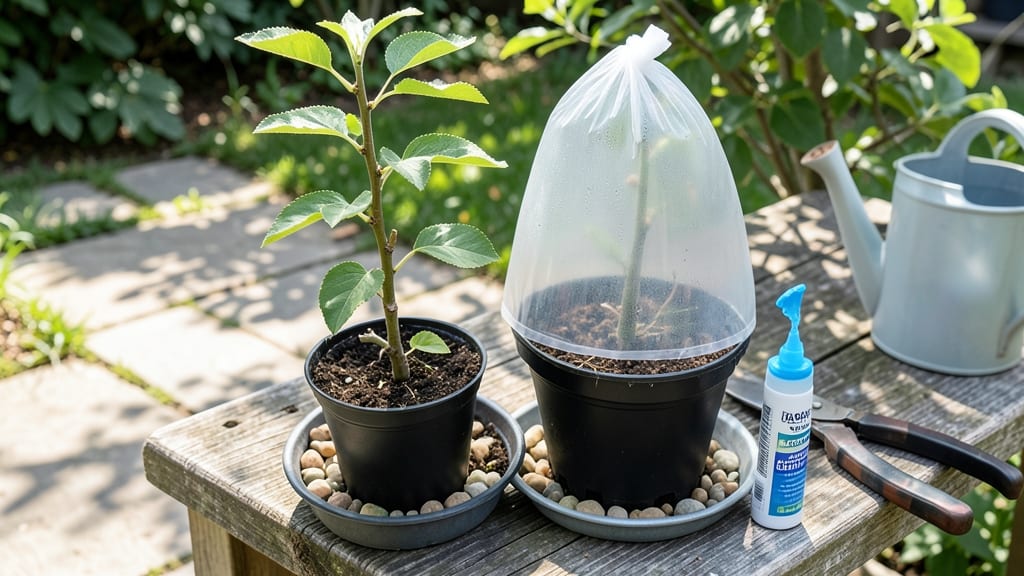
Learn how to propagate fruit trees the easy way—rooting cuttings is the foolproof method to grow your own thriving orchard without spending a dime on nursery stock. I’ve turned scraps from my backyard apple and peach trees into thriving saplings—no green thumb required, just patience and the right technique.
The best part? You’ll save money and get varieties tailored to your climate that aren’t sold at garden centers.
You’ll need just a few simple tools: sharp pruners, rooting hormone, small pots, and a well-draining soil mix. Timing matters too—spring and early summer are ideal for most fruit trees, when new growth is vigorous but not yet hardened off.
For stubborn varieties like figs or citrus, layering or air-layering works better than cuttings, but we’ll focus on the straightforward method that works for apples, peaches, and plums.
By the end of this process, you’ll have strong, rooted cuttings ready to transplant into the ground or larger containers. Imagine biting into fruit from a tree you grew yourself—sweet, juicy, and bursting with flavor.
The key is keeping the cuttings moist and in bright, indirect light until roots form, usually within 4-8 weeks.
Even if your first few cuttings don’t take, you’ll learn what works in your space. Some trees root easier than others, but once you master the basics, you can experiment with heirloom varieties or rare finds from neighbors’ yards. Let’s get those cuttings growing!
📚 In This Guide
- What you need
- Instructions
- Tips and common mistakes
- Wrapping up and next steps
What you need
- ● Sharp pruning shears or a clean knife – For taking clean, precise cuttings (sterilize with rubbing alcohol first!).
- ○ Rooting hormone (optional but recommended) – A powder or gel to boost root growth (e.g., Clonex or Dip ‘N Grow).
- ● Well-draining potting mix – A blend of perlite, vermiculite, and peat moss (or a pre-mixed rooting medium).
- ● Small pots or trays (3–4 inches deep) – With drainage holes (4–6 pots, depending on the number of cuttings).
- ● Clear plastic bags or domes – To create a humid microenvironment (e.g., zip-top bags or humidity domes).
- ● Spray bottle – For misting cuttings (keep soil and air moist but not soggy!).
- ● Healthy fruit tree branches – Mature, disease-free wood (½–¾ inch thick, 4–6 inches long).
- ● Warm, indirect light – A bright windowsill or grow light (avoid direct sun to prevent drying).
- ● Consistent humidity – Aim for 70–90% (use a hygrometer if precise monitoring is needed).
- ● Stable temperature – Ideally between 65–75°F (18–24°C) for optimal rooting.
- ● Fungicide (e.g., Mycorrhizal inoculant) – Prevents rot in damp conditions.
- ● Label markers – To track tree varieties (especially useful for large collections!).
- ● Heating mat (for stubborn cuttings) – Speeds up rooting in cooler climates.
Step-by-Step instructions for propagating fruit trees from cuttings
Here's the straightforward method I've used to root peach, apple, and plum cuttings successfully.
🌱 Step 1: Select and Prepare Healthy Cuttings
Choose semi-hardwood cuttings—about 6-8 inches long—from the current season's growth. Look for pencil-thick stems with 3-4 leaf nodes and no signs of disease. I always take cuttings in late summer when new growth has matured but isn't fully hardened off.
Use sharp pruners to make a clean cut just below a leaf node. Remove all but the top 2-3 leaves to reduce moisture loss. Dip the cut end in rooting hormone powder—this triples your success rate. I like to keep a small container of it handy so the cuttings stay fresh until planting.
💧 Step 2: Create the Rooting Medium
Fill a 6-inch deep container with a mix of 50% perlite and 50% peat moss—this ensures proper drainage while holding moisture. I use a small plastic tray with drainage holes to prevent soggy roots. Moisten the mix until it feels like a damp sponge, not dripping wet.
Make holes with your finger or a pencil, about 2 inches deep, spaced 4 inches apart. The holes should be just wide enough to accommodate your cuttings without bending. Gently tap the container to settle the mix around each cutting—this eliminates air pockets that could rot the stem.
☀️ Step 3: Maintain Ideal Conditions for Rooting
Place the container in a bright, indirect light spot—no direct sun for the first 4-6 weeks. I keep mine on a shelf near a north-facing window. Cover the container loosely with clear plastic wrap to retain humidity, but leave space for air circulation. Mist the leaves occasionally to prevent them from drying out.
Keep the medium consistently moist—not soggy, but never dry. I check daily by sticking my finger 1 inch deep into the mix. If it feels dry, add a little water. Root formation starts in 4-8 weeks, depending on the tree type. Peach cuttings often root fastest, while apple can take longer.
⏰ Step 4: Transplant When Roots Form
After 6-8 weeks, gently tug on the cuttings. If you feel resistance, roots have formed. Remove the plastic cover gradually over 3-5 days to acclimate the new plants. Transplant into individual 4-inch pots filled with the same perlite-peat mix, burying the stem up to the first leaf node.
Place the pots in partial shade for another 2 weeks before moving them to full sun. Water lightly but consistently—young roots are fragile. Once they've established in pots, you can transplant them to the ground in spring, when the soil warms up to 60°F or higher.
Tips & tricks for perfect fruit tree propagation
Here's what I wish I knew before attempting this for the first time—these little details make all the difference.
The Right Time Matters: Late summer is ideal because the new growth has matured enough to root but hasn't hardened off completely. If you miss this window, wait until early spring when the tree starts new growth again. I've tried this in fall and winter, and the success rate drops dramatically because the plant's energy is focused on survival, not root development.
Cutting Preparation is Critical: When you make that clean cut just below a leaf node in Step 1, make sure it's slanted—not straight across. This increases surface area for root formation. Also, don't forget to remove the lower leaves completely, not just trim them. Those leaves will draw moisture from the cutting and slow down rooting.
Medium Mix Secrets: The 50/50 perlite to peat moss ratio in Step 2 is perfect, but here's the trick: sterilize your mix first by baking it in the oven at 200°F for 30 minutes. This kills any pathogens that could harm your delicate cuttings. I also like to add a handful of worm castings to the mix—they provide natural nutrients that help jumpstart root growth.
Light and Humidity Balance: That bright, indirect light in Step 3 is crucial, but don't place your cuttings where they'll get even a few hours of direct sun. Too much light causes the leaves to dry out and burn. For humidity, I've found that using a clear plastic dome (like a large plastic container with the top cut off) works even better than plastic wrap—it creates a more stable humidity environment while still allowing airflow.
Pro Tips for Propagate Fruit Trees
- Here's what I wish I knew before attempting this for the first time—these little details make all the difference.
- The Right Time Matters: Late summer is ideal because the new growth has matured enough to root but hasn't hardened of...
- Cutting Preparation is Critical: When you make that clean cut just below a leaf node in Step 1, make sure it's slante...
Frequently asked questions
Got questions about propagating fruit trees?
You’re not alone! Here are answers to the most common concerns—so you can grow your own thriving orchard with confidence.
What’s the best time of year to take fruit tree cuttings?
The ideal window is late winter to early spring (just before buds swell) or mid-summer (when new growth is vigorous). Avoid extreme heat or cold—aim for 60–75°F soil temps. For tropical fruit trees (like citrus), you can propagate year-round in warm climates.
Can I propagate any fruit tree from cuttings?
Most fruit trees can be propagated this way, but some (like apples and pears) root better from grafts. Citrus, figs, olives, and avocados are easy from cuttings. Research your specific tree—some varieties are stubborn! Seedlings may not match the parent fruit’s traits, so cuttings are the way to go for consistency.
Why are my cuttings rotting or turning mushy?
Overwatering or poor drainage is the usual culprit. Use a well-draining mix (like perlite + peat moss) and keep humidity high (a plastic bag or propagator helps). Ensure cuttings aren’t buried too deep—only 1–2 inches should be submerged. Yellowing leaves? It might be fungal—spray with fungicide or adjust moisture.
How long does it take for fruit tree cuttings to root?
Patience is key! Most cuttings root in 4–12 weeks, depending on the species. Citrus and avocados often root faster (4–6 weeks), while stone fruits (peaches, cherries) can take longer. Check for resistance at the base—if it’s firm, you’re on the right track! Transplant once roots are 1–2 inches long.
What if I don’t have rooting hormone—can I still succeed?
Yes! While rooting hormone boosts success rates (especially for tricky trees), you can try natural alternatives. Dip cuttings in cinnamon powder (antifungal) or honey (antibacterial). Some gardeners swear by willow water (soak willow branches in water for 24 hours, then use the liquid). Just be prepared for slower results!
Wrapping up and next steps
You’ve got all the tools—and knowledge—to grow your very own fruit trees from cuttings!
Whether you’re a beginner or a seasoned gardener, propagation is a rewarding way to expand your orchard without breaking the bank. 🌱 Start small, stay patient, and soon you’ll be harvesting fresh fruit straight from trees you nurtured yourself.
Ready to take the next step? Experiment with different fruit varieties or share your newfound skills with fellow gardeners. Happy growing—your future harvest is waiting! 🍎🍑