
Pruning
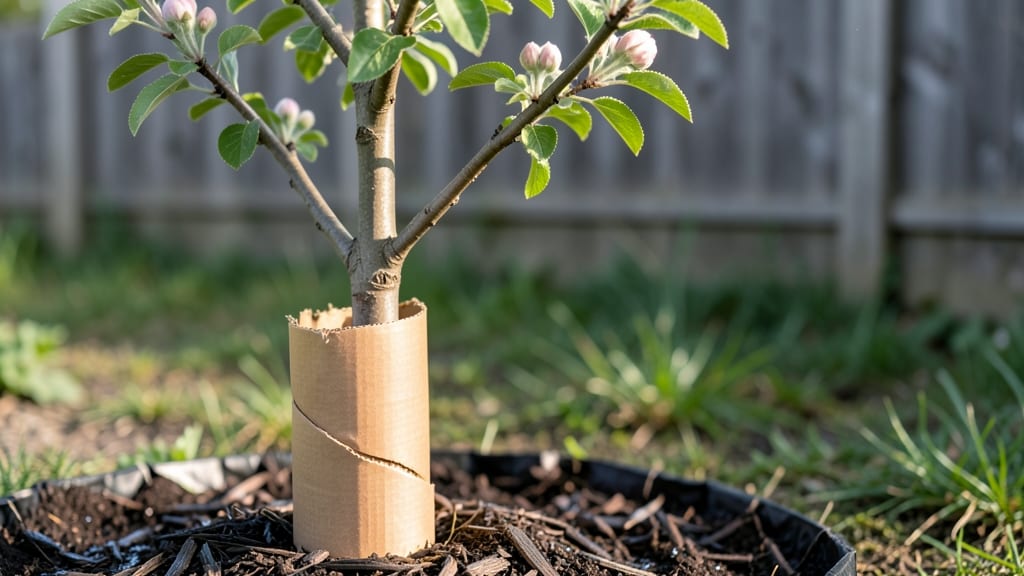
The right new tree protection isn’t just about survival—it’s about setting a young tree up to thrive for decades. 🌳 I’ve seen them snap in storms or get girdled by rabbits within months, but early care changes everything.
The key is combining smart pruning with physical safeguards before problems even start.
Most people focus only on staking or mulching, but true protection means addressing all threats at once. You’ll need flexible tree guards to deter animals, sturdy stakes to prevent wind rock, and proper pruning to encourage strong branch structure.
Even the soil around the base needs attention—compacted or eroded ground weakens roots faster than you’d think.
By following this blueprint, you’ll end up with a tree that bends in storms instead of snapping, resists pests without chemicals, and grows straight and strong. The first year is critical, but the payoff is a mature tree that outlasts its neighbors by years.
Let’s get your tree off to the right start.
This works for any young tree—ornamental, fruit, or shade—whether you’re planting in a windy yard, urban sidewalk, or rural lot. The principles scale with the tree’s size and your local climate challenges. Ready to make your investment last?
📚 In This Guide
- What you need
- Instructions
- Tips and common mistakes
- Wrapping up and next steps
What you need
- ● Pruning shears: Bypass pruners (for cuts 1 pair (e.g., Felco F-2 or Corona 3-in-1).
- ● Loppers: Heavy-duty bypass (1.5"–2" cut capacity) – 1 pair (e.g., Fiskars X27).
- ● Pruning saw: Curved-tooth (for branches 2"+ thick) – 1 saw (e.g., Bahco Laplander).
- ● Tree wrap: Plastic or fabric (3"–4" width) – 50+ feet (e.g., Tree Tender Brand).
- ○ Pruning sealant: Wound dressing (optional but recommended for large cuts) – 1 small tub (e.g., Tanglefoot Tree Wound Pruning Seal).
- ● Safety gear: Gloves (cut-resistant, e.g., Mechanix Wear).
- ● Eye protection (ANSI-rated goggles).
- ● Steel-toe boots or sturdy shoes.
- ● Cleaning supplies: Rubbing alcohol (70%+) or bleach solution (1:10 ratio).
- ● Paper towels or rags.
- ● Extension pole: For hard-to-reach branches (e.g., 6–10 ft telescoping pole).
- ● Ladder: Sturdy, extendable (if working >8 ft off ground).
- ● Disinfectant spray: For sterilizing tools between trees (e.g., 10% bleach spray).
- ● Tree spray: Fungicide (e.g., copper-based) for disease prevention in high-risk areas.
- ● GPS or app: For mapping weak branches (e.g., TreeTopia or iTree).
- ● ✅ Know your tree: Research species-specific needs (e.g., oaks bleed heavily; avoid pruning in late winter).
- ● ✅ Check local laws: Some areas require permits for large-tree pruning.
- ● ✅ Weather window: Prune on dry, calm days (avoid storms or rain for 24 hours post-prune).
- ● 💡 Tool prep: Sharpen blades and disinfect tools before starting to prevent disease spread.
- ● 🌡️ Seasonal timing: Best for deciduous trees: Late fall/winter (dormant season); evergreens: Early spring.
How to protect young trees through strategic pruning
Here's my go-to approach for safeguarding new trees against storms and pests.
🌱 Step 1: Assess the Tree's Natural Structure
Start by examining the tree's form before making any cuts. Look for weak branch unions where limbs grow at sharp angles—these are prime storm damage risks. I focus on branches that cross or rub against each other, as these will eventually tear through bark and create entry points for disease.
Use your hand as a reference: any branch thicker than your wrist should be evaluated carefully. The goal here is to identify structural weaknesses, not to remove everything that looks imperfect. Young trees need their natural framework to develop strength over time.
🌿 Step 2: Remove Hazardous Branches First
Target branches that grow directly upward or downward—these are called "water sprouts" or "codominant stems" and they're the first to snap in high winds. Make clean cuts just outside the branch collar (the swollen area where the branch meets the trunk) using sharp pruning shears or a pruning saw for thicker branches.
Never leave stubs—this creates wounds that take years to heal. For branches thicker than 2 inches, make a second cut about 6 inches out from the trunk, then a third cut to remove the branch completely. Always cut on the outside of the branch bark ridge to prevent tearing.
✂️ Step 3: Thin the Canopy Strategically
Work from the inside out, removing branches that grow toward the center of the tree. This improves airflow and sunlight penetration, which prevents fungal diseases that thrive in damp, shaded conditions. Aim to reduce the canopy density by about 20-25%—just enough to create space without weakening the tree's overall structure.
For deciduous trees, prioritize branches that grow at angles less than 45 degrees to the trunk. These are more likely to break under heavy snow or ice loads. Remember, you're not trying to create a perfectly shaped tree—you're preparing it to withstand nature's challenges.
💧 Step 4: Apply Protective Measures After Pruning
After making your cuts, seal larger wounds (over ½ inch in diameter) with a tree wound dressing that contains mycorrhizal fungi. This helps the tree heal faster by promoting natural callus formation. For smaller cuts, no sealing is needed—just let the tree's natural defenses take over.
Install tree guards made of flexible plastic or metal around the trunk to protect against rodent damage and lawn equipment. These should extend at least 2 feet above the ground and be secured tightly but not so tight they restrict trunk expansion as the tree grows.
☀️ Step 5: Establish Long-Term Care Routine
Schedule a follow-up inspection in 6 months to check for new water sprouts or storm damage. Young trees grow rapidly, and what looked safe in winter might become a hazard by summer. I mark each tree with a small flag showing the current year to track its growth progression.
Water deeply once a week during dry periods to encourage strong root development—deep roots make for storm-resistant trees. Mulch with 2-3 inches of organic material (like shredded bark) and keep it 6 inches away from the trunk to prevent rot. This creates a protective barrier against temperature fluctuations and physical damage.
Tips & tricks for perfect young tree protection
Here's what I've learned over years of pruning young trees to keep them strong and healthy.
Branch Angle Assessment: In Step 1, when evaluating branch angles, remember that branches growing at 45 degrees or less to the trunk are most vulnerable to breaking. Use a small mirror or phone camera to check hard-to-see angles—sometimes the weakest branches hide behind others. I also bring a friend to spot-check branches I can't see from my position.
Pruning Technique for Thick Branches: For branches thicker than 2 inches in Step 2, take your time with the three-cut method. The second cut should be made at a slight downward angle to prevent the branch from tearing when it falls. I mark the cut line with a piece of chalk before making any cuts to ensure precision—this prevents accidental over-cutting.
Canopy Thinning Strategy: When thinning the canopy in Step 3, aim to remove branches that are about one-third the diameter of the trunk they're attached to. This creates an open, airy structure that reduces wind resistance. I always step back every few cuts to visualize the tree's overall shape—what looks balanced from close range might look uneven from a distance.
Wound Care Follow-Up: After sealing larger wounds in Step 4, monitor them weekly for signs of infection like oozing sap or discolored bark. If you notice these signs, apply a second layer of wound dressing and consider consulting a certified arborist. I keep a small notebook to record the date of each pruning session and any treatments applied—this helps track healing progress.
Pro Tips for New Tree Protection
- Here's what I've learned over years of pruning young trees to keep them strong and healthy.
- Branch Angle Assessment: In Step 1, when evaluating branch angles, remember that branches growing at 45 degrees or le...
- Pruning Technique for Thick Branches: For branches thicker than 2 inches in Step 2, take your time with the three-cut...
Frequently asked questions
Got questions about safeguarding your trees with smart pruning?
Here are answers to the most common concerns—whether you're prepping for storms, boosting longevity, or troubleshooting tricky cuts. Let’s dive in!
Why should I prune now instead of waiting for spring?
Pruning in late winter or early spring (before buds swell) is ideal because trees are dormant, making it easier to see their structure and reduce stress. However, storm-pruning can be done year-round—just avoid heavy pruning in extreme heat or cold. Focus on removing weak branches now to prevent storm damage later!
How do I know if my tree needs storm-resistant pruning?
Look for dead, diseased, or crossing branches—these are storm hazards. Also check for branches growing at sharp angles (45° or less) or those heavier than 3 inches in diameter. If your tree is near power lines or a home, prioritize pruning these risks. Need help? Consult a certified arborist for a free assessment!
Can I prune my tree myself, or should I hire a pro?
Small tasks like removing dead branches or thinning the canopy? DIY-friendly! But for large trees, storm-pruned limbs, or complex structures, hire a licensed arborist. Pro tip: Use sharp tools, disinfect cuts, and avoid over-pruning—never remove more than 25% of the canopy at once.
What’s the best way to heal pruning wounds?
Leave large cuts (over 2 inches) untreated—they’ll seal naturally. For smaller wounds, apply pruning sealant only if the tree is disease-prone (like oaks). Focus on proper cuts: Make the first cut just outside the branch collar, then follow the branch’s natural shape. See a diagram for clarity!
Are there alternatives to traditional pruning for storm protection?
Yes! Consider cabling and bracing for weak branch unions, or tree support systems for young trees in high-wind areas. For large properties, windbreaks (like evergreen hedges) can reduce storm impact. Always pair these with root-zone care—healthy roots = stronger trees!
Still unsure? Drop your tree’s species or concerns below—we’re happy to help!
Wrapping up and next steps
Protecting your trees isn’t just about aesthetics—it’s an investment in their longevity, health, and resilience against storms and disease. By following a thoughtful pruning blueprint, you’re giving your trees the best chance to thrive for decades to come. 🌳💚
Ready to take action? Start by assessing your trees this season—whether it’s removing dead branches, shaping for wind resistance, or consulting a local arborist for expert guidance. Every cut you make today is a step toward a stronger, greener tomorrow!